Virtualizor's automatic OS reinstaller rebuilds your VPS from a ready-made operating system template in a few minutes, with no ISO upload, no rescue media and no console work. It is the fastest way to get back to a clean server when an installation has gone wrong, when you want to move from one distribution to another, or when you are handing the machine on to a new project. This guide covers the automatic reinstaller in the Virtualizor end-user panel on your Noiz VPS: what it does, what it destroys, and what you must have in hand before you click the button.
Warning: a reinstall permanently destroys every file on the VPS. Reinstalling does not repair, upgrade or refresh the existing system. It formats the disk and writes a brand new operating system over it. Websites, databases, mailboxes, configuration files, SSH keys, TLS certificates, cron jobs and control panel data are all gone the moment the reinstall starts, and there is no undo and no cancel. Take a verified backup and copy it off the VPS before you go any further. If the server is already broken and you are reinstalling in order to recover, stop: reinstalling will destroy the data you are trying to recover. Use Virtualizor's Rescue Mode to pull the data off first, or open a ticket with Noiz support.
Last reviewed: 27 July 2026, against the current Virtualizor release and its end-user panel. This guide is written for Noiz VPS hosting and is kept current against Virtualizor. It complements, and does not replace, the official Virtualizor documentation linked below.
Official Documentation Reference
- Virtualizor: Re-Install OS (end-user)
- Virtualizor: Manage VPS
- Virtualizor: End-user backup
- Virtualizor: Rescue Mode
Prerequisites
- Your Virtualizor end-user panel address and login, sent by Noiz with your VPS details. This is the VPS control panel, not the Noiz client area.
- A current backup that you have copied off the VPS and confirmed you can open.
- A decision on which distribution and version you want, taken before you start. Changing your mind afterwards means reinstalling again.
- A record of anything you will need to rebuild: web server configuration, database dumps, DNS records, firewall rules, licence keys and SSH public keys.
Before You Start: Take a Backup
This is the step people skip and then regret. Virtualizor gives you a backup icon on the VPS Management page with an option to take a backup immediately, and it lists any backups already held. Run one, then treat it as a starting point rather than a safety net.
A few points worth being firm about:
- Copy the important data off the VPS yourself. Pull database dumps, site files and mail down over SFTP to a machine you control. Backups that only exist inside the platform you are about to reformat give you fewer options than you think.
- Check the backup opens. An archive you have never extracted is a hope, not a backup. Extract it somewhere and look inside before you reinstall.
- Dump databases properly. Copying raw MySQL or PostgreSQL data directories from a running server produces files that often will not import cleanly. Use the database's own dump tool.
- Save your licences and keys. Control panel licences, commercial plugin keys and API credentials are frequently tied to the installation and need reissuing after a rebuild. Find out now, not afterwards.
If the VPS will not boot and the data on it still matters, do not reinstall. Enable Rescue Mode instead, which boots the VPS into a small recovery system and lets you mount the original disk and copy files off it. Reinstalling is for when you have accepted the loss of everything currently on the disk.
How to Reinstall the Operating System
The reinstall lives on the VPS Management page in the end-user panel. Depending on the Virtualizor build running on your node, the section is labelled Install or OS Re-Install. The controls behind it are the same in both, and the screenshots below still map cleanly onto the current panel.
1. Log in to your Virtualizor control panel.
2. From the left side panel, click on List VPS.
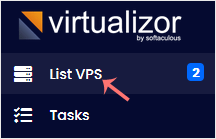
3. Hover your mouse over the appropriate VPS, and that line will be highlighted. Then click on the Manage icon in the highlighted line. If you run more than one VPS, check the hostname and IP address in that row carefully before you continue. There is no confirmation later that tells you which server you picked.

4. Click on the Install tab, labelled OS Re-Install in newer Virtualizor builds.
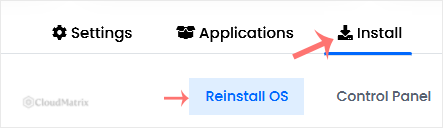
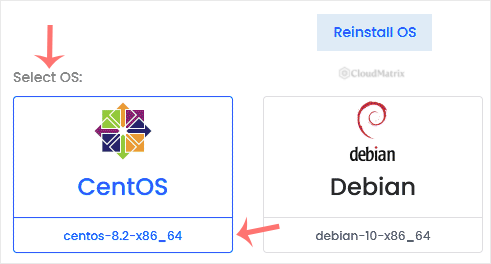
5. Under Reinstall OS, select the appropriate OS. If it has more than one version, select the appropriate version. Only templates that are present on the node your VPS runs on appear in this list, so it is normal for it to be shorter than the full catalogue of distributions Virtualizor supports.
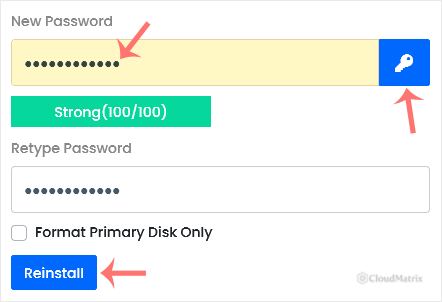
6. In the password field, enter the password or click on the key icon to generate a random one. Save it in a safe place, and then click on Reinstall. This becomes the root password on the newly installed system, and it is the only credential you will have to get back in, so record it before you click. If a Format Primary Disk Only option is shown, it limits the wipe to the first disk attached to the VPS and leaves any secondary disks untouched. That is useful when your data lives on a separate volume, but it is not a substitute for a backup.
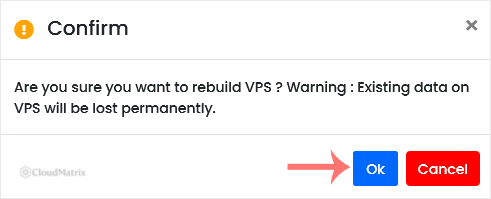
7. A confirmation box will prompt. Click OK to proceed. This is the point of no return: the disk is formatted as soon as you confirm, and the job cannot be stopped part way through.
OS reinstallation usually takes 5 to 10 minutes. Larger templates, Windows images and busy nodes can take longer. Leave the page open and let the progress indicator finish rather than reloading or navigating away.
After the Reinstall
What survives a reinstall is the VPS itself: its IP addresses, its resource allocation, its entry in your Noiz billing, and its place in the panel. What does not survive is everything that was on the disk. Expect to deal with the following:
- Your SSH client will refuse to connect. The new installation generates new SSH host keys, so your client sees a changed fingerprint and warns about a possible impersonation attempt. That warning is correct and expected here. Clear the stale entry with
ssh-keygen -R your.vps.ip.addressand connect again. - You log in as
rootwith the password you set at step 6. Any user accounts, sudo rules and authorised SSH keys from the old system are gone. Re-add your public key and disable password authentication again if that was your previous setup. - Firewall rules are back to the template defaults. Whatever hardening you had applied no longer exists. Put your firewall rules back before you expose any service to the internet, and do it in the same session, not next week.
- Control panels, web servers, databases and mail are not there. If your VPS ran a control panel, install it fresh and reapply its licence. Restore data only after the panel and services are running and configured.
- TLS certificates need reissuing. Private keys were on the wiped disk. Request new certificates once the web server is answering on the domain again.
- DNS usually needs no change. The IP address normally stays with the VPS across a reinstall, so your records keep pointing to the right place. Confirm the IP in the panel before assuming it, and if it has changed, update your DNS and allow for propagation.
Troubleshooting
Symptom: the distribution or version you want is not in the list. The reinstaller can only use OS templates already loaded on the node hosting your VPS. Open a ticket with Noiz support and ask whether the template can be added, or install from an ISO instead, which lets you supply your own image and control the partitioning.
Symptom: the reinstall seems stuck well past 15 minutes. Connect to the VPS console over VNC and look at what is on screen. An installer waiting on a prompt, a template still being written, or a boot loop all look identical from the panel, and the console tells you which one you are looking at.
Symptom: SSH reports "REMOTE HOST IDENTIFICATION HAS CHANGED". This is the expected result of a reinstall, not a sign of a problem. Remove the old host key from your known hosts file with ssh-keygen -R your.vps.ip.address, then reconnect and accept the new fingerprint.
Symptom: the root password is rejected. Retype it manually rather than pasting, in case a trailing space or a character your keyboard layout renders differently crept in. If it still fails, set a new root password from the Virtualizor panel and try again with something free of ambiguous characters.
Symptom: data is still present after the reinstall. If Format Primary Disk Only was ticked, secondary disks attached to the VPS are deliberately left alone. That is working as designed. Mount the secondary disk on the new system to reach that data.
Symptom: you reinstalled and then realised you needed something off the old disk. There is no recovery path once the format has run. Restore from the backup you took beforehand. This is the reason the backup step is not optional.
Related Articles
- How to Manually Install/Reinstall an OS Using Virtualizor for a Customized Installation, for when you need a distribution or a partition layout the automatic reinstaller does not offer.
- How to Access VPS via VNC in Virtualizor, for watching an install run or reaching a VPS that will not accept SSH.
If you are unsure whether a reinstall is the right fix, or you need data recovered from a VPS that will not boot, open a ticket with Noiz support before you reinstall. Once the format has started, the options narrow to whatever backup you took first.






