FileZilla Client is a free, open source file transfer program for Windows that speaks FTP, FTPS (FTP over TLS) and SFTP (SSH file transfer). It is the tool most Noiz customers use to upload a website, pull a backup down to their PC or fix a single file without going through a control panel file manager. This guide walks you through installing it cleanly on Windows, including the bundled software offers that appear inside the installer and how to refuse them.
Last reviewed: 27 July 2026, against FileZilla Client 3.70.6 (latest stable). This guide is written for Noiz hosting and is kept current against FileZilla. It complements, and does not replace, the official FileZilla documentation linked below.
The screenshots in this article were captured on an earlier 3.x release. The installer wording and button positions are effectively unchanged in the current version, so the flow you see on screen will match.
Official Documentation Reference
- FileZilla Client download page (the only download source you should use)
- FileZilla wiki: Client Installation
- FileZilla wiki: Documentation index
- FileZilla changelog (check what changed before upgrading)
Prerequisites
- A Windows PC you can install software on. Standard user accounts will trigger a prompt for administrator credentials.
- Windows 10 or Windows 11 for the current release. Older Windows versions need an older FileZilla build, covered under Troubleshooting.
- Your Noiz FTP details (host, username, password, port). You do not need them to install FileZilla, only to connect afterwards.
Step 1: Download the Installer
- Go to the official FileZilla Client download page.
- Choose the Windows (64bit x86) package unless you are on a genuinely 32-bit machine.
- Pick the plain FileZilla download, not FileZilla Pro. The free client does everything you need for Noiz hosting; Pro is a paid product that adds cloud storage protocols such as S3 and Google Drive.
Download from the project site only. FileZilla is one of the most heavily repackaged applications on the internet, and third-party download portals routinely wrap it in adware installers. If a search result is not on filezilla-project.org, close it.
Step 2: Run the Setup File
- Double click the downloaded setup file, which is named along the lines of
FileZilla_3.70.6_win64-setup.exe.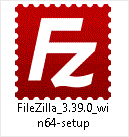
- Windows may show a User Account Control prompt, or a SmartScreen warning if the file is newly released. Read it, confirm the file is the one you just downloaded from the project site, then allow it to run.
Step 3: Accept the Licence
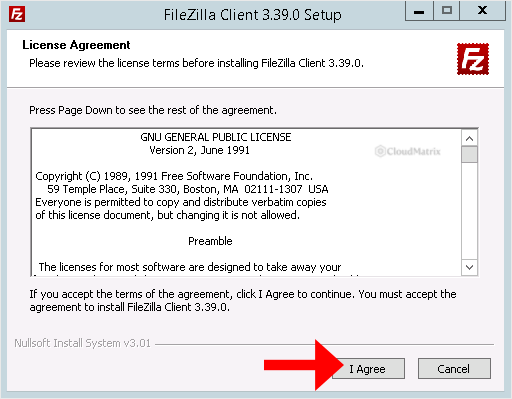
FileZilla is released under the GNU General Public Licence. The first setup screen shows the licence text. Read it and click I Agree to continue.
Step 4: Refuse the Bundled Offers
This is the step that catches people out, so slow down here. The official installer is funded partly by sponsored offers, and it presents one or more screens advertising unrelated software (browser add-ons, system utilities, download managers). Those screens are deliberately styled to look like part of the FileZilla setup.
How to spot and refuse them:
- An offer screen names a product that is not FileZilla. If the title bar or heading mentions anything else, it is an advert.
- Offer screens usually carry Decline and Accept buttons rather than the standard Back and Next pair. Click Decline, Skip or Nope. Declining does not cancel the FileZilla installation.
- Never click through setup on autopilot. Read each screen before clicking.
- Watch for pre-ticked boxes offering to change your browser home page or default search engine, and untick them.
The number and content of these screens changes over time, so what you see may not match any screenshot exactly. The rule stays the same: if it is not FileZilla, decline it.
Step 5: Choose the Install Options
- Install for all users or only for me: choose all users on a shared machine, or only for you if you do not have administrator rights.
- Components: the defaults are correct. The icon sets and language files are optional extras you can safely leave selected or clear.
- Destination folder and Start Menu folder: accept the defaults unless you have a reason not to.
- Click Install.
Step 6: Finish the Installation
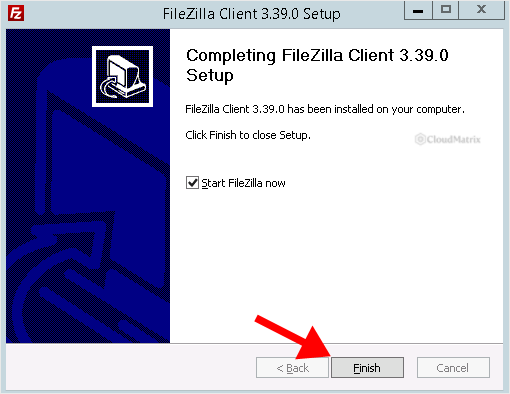
Installation normally takes a few seconds, though a slower machine or an active antivirus scanner can stretch that out. When the completion screen appears, leave Start FileZilla now ticked and click Finish.
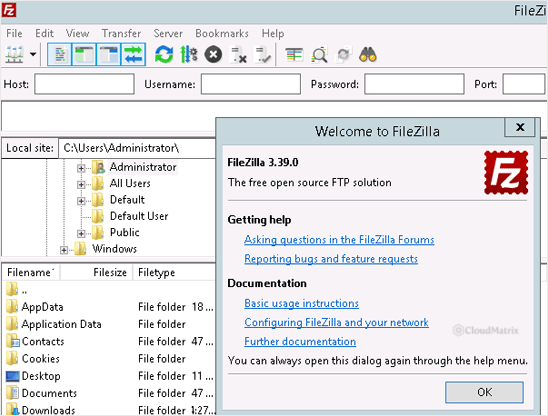
FileZilla opens with a welcome dialog listing links to the project forums and documentation. Close it with OK. The main window is split into a local file pane on the left, a remote file pane on the right, a message log across the top and a transfer queue along the bottom.
To confirm which version you installed, open Help then About FileZilla.
Before You Connect: Two Settings Worth Knowing
- Password storage. The first time you save a connection, FileZilla asks how to handle passwords. Choosing Save passwords protected by a master password encrypts your stored hosting credentials so they are not sitting in a plain text file on your PC. On a shared or laptop machine, take that option. If you forget the master password there is no recovery, so record it in your password manager.
- Updates. FileZilla checks for new versions on its own and prompts you to install them. Keep this on. FTP clients handle credentials and network connections, so running an outdated build is a genuine risk rather than a cosmetic one.
Next Step: Connect to Your Hosting
With FileZilla installed, the next job is adding your Noiz account to the Site Manager and connecting. That is covered in How to Access or Connect to the FTP via FileZilla.
Use an encrypted connection wherever possible. Plain FTP sends your username and password across the network unencrypted, so prefer FTPS (explicit FTP over TLS) or SFTP on your Noiz hosting account.
Troubleshooting
Symptom: Windows says "Windows protected your PC" and refuses to run the installer. This is SmartScreen reacting to a file it has not seen often yet, which is normal for a freshly published release. Click More info, check the publisher, then Run anyway. Only do this for a file you downloaded yourself from filezilla-project.org.
Symptom: your antivirus flags the installer. Detections on FileZilla installers almost always relate to the bundled offer component, not to FileZilla itself. Re-download from the project site, and if the warning persists, use your antivirus vendor's submission form to check the file rather than disabling protection.
Symptom: setup asks for an administrator password you do not have. Re-run the installer and select the option to install for the current user only, which writes into your own profile instead of Program Files.
Symptom: the current version will not install on an older Windows PC. Recent FileZilla releases drop support for end of life Windows versions. Older builds are published on the project's download servers, but an unsupported operating system is itself the bigger problem. Where you can, move the transfer work onto a supported machine.
Symptom: FileZilla installed but there is no desktop shortcut. Search the Start menu for FileZilla, right click the result and choose Pin to Start or Open file location to create a shortcut yourself.
Symptom: FileZilla opens but nothing connects. That is a connection issue rather than an installation issue. Check your host, username, port and encryption settings against the details on your Noiz account, and see the connection guide linked above.
Getting Help
If FileZilla installs but will not reach your hosting account, open a ticket from the Noiz client area with the exact text from the FileZilla message log. The log lines tell Noiz support straight away whether the problem is credentials, encryption settings, a firewall on your side or something on the server, which usually saves a round of back and forth.






