Exporting a database in phpMyAdmin produces a single downloadable .sql file containing the SQL statements needed to rebuild that database: the table structures and, by default, all of the data inside them. It is the quickest way to take a portable copy of a site's database before an upgrade, when migrating a site to another host, or when a developer asks you for "a copy of the database".
This guide covers exporting an entire database, which is what most people need, and also shows you how to export a single table when that is all you want. The steps are the same whichever hosting control panel your Noiz account uses, because phpMyAdmin itself is the same tool in each one.
Last reviewed: 27 July 2026, against phpMyAdmin 5.2.3 (latest stable). This guide is written for Noiz hosting and is kept current against phpMyAdmin. It complements, and does not replace, the official phpMyAdmin documentation linked below.
Official Documentation Reference
- phpMyAdmin: Import and export
- phpMyAdmin: Frequently asked questions (export and import limits)
- MySQL Reference Manual: mysqldump
Prerequisites
- An active Noiz hosting account with at least one MySQL or MariaDB database.
- Your hosting control panel login details, or a direct phpMyAdmin login for the database user.
- Somewhere on your computer with enough free space for the dump file. A database dump is plain text and compresses well, but an uncompressed dump of a busy site can be several hundred megabytes.
Opening phpMyAdmin
- Log in to your hosting control panel from the Noiz client area.
- In the Databases section, click phpMyAdmin. Some panels place the link beside each individual database in the database list rather than as a separate icon.

Opening phpMyAdmin from the control panel signs you in automatically, so no separate database password is needed. If you reach phpMyAdmin through a direct URL instead, log in with the database username and password from your site's configuration file, for example wp-config.php for WordPress or configuration.php for Joomla.
Exporting the Whole Database
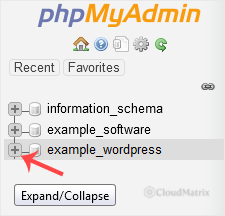
- In the navigation tree on the left, click the database you want to export. Selecting the correct database first is the step that matters most: if you run an export while phpMyAdmin is still on the server home page, you will get a dump of every database you can see, which is usually not what you want.
- With the database selected, click the Export tab along the top of the page.

- Leave Export method set to Quick and Format set to SQL. Quick exports every table with structure and data using sensible defaults, which is exactly what a backup or a migration needs.
- Click Export. On older phpMyAdmin releases this button is labelled Go.
The browser downloads a file named after the database, such as yourdatabase.sql. Large databases take a while, and nothing appears to happen until the download begins, so give it time before clicking again. Clicking a second time starts a second export and doubles the load on the server.
Useful Custom Export Options
Choose Custom instead of Quick when you need any of the following. Everything else can be left at its default.
- Compression: set this to gzipped or zipped. A compressed dump is typically five to ten times smaller, downloads far faster, and is much less likely to time out. This is the single most useful option on the page.
- Structure and data: switch to Structure only to get an empty copy of the schema, or Data only when the tables already exist on the destination.
- Add DROP TABLE / VIEW / PROCEDURE / FUNCTION / EVENT statement: tick this if the dump will be imported over an existing copy of the same database. Without it, the import fails with "table already exists" errors. With it, the import destroys the existing tables before recreating them, so only use it when that is what you intend.
- Character set of the file: leave this as
utf8. Changing it is the usual cause of accented characters, currency symbols and emoji turning into mojibake after a restore. - Database system or older MySQL server: set this if you are importing into an older or different database server. It adjusts the syntax the dump uses so the target server accepts it.
Exporting a Single Table
To export one table rather than the whole database, click the database in the left navigation tree, then click the table itself so that its name appears in the breadcrumb at the top of the page. Now click Export and continue as above. The export applies to whatever is currently selected, so always check the breadcrumb before clicking Export.
You can also select several tables at once: from the database's Structure tab, tick the tables you want, choose Export from the With selected dropdown at the bottom of the list, and continue from the Export page.
Checking the Export Worked
A truncated dump looks perfectly normal until the day you try to restore it, so it is worth thirty seconds of checking:
- The file size should be plausible. A few kilobytes for a site with years of content means the export failed part way through.
- Open the file in a plain text editor (not a word processor) and scroll to the end. A complete dump finishes with a comment line beginning
-- Dump completed on. If the file simply stops in the middle of an INSERT statement, the export timed out. - The top of the file should list the expected tables in the
CREATE TABLEstatements.
Keep in mind that a database dump is not a complete backup of a website. Your files, uploads, themes and configuration live on the filesystem, not in the database. A restorable backup needs both.
Troubleshooting
The download stops early or the file is incomplete: the export exceeded the PHP execution time or memory limit before it finished. Run the export again with Custom selected and Compression set to gzipped, which reduces both the time and the amount of data sent to the browser. If it still fails, the database is too large for a browser-based export and should be dumped over SSH instead.
Nothing downloads at all: check that a browser extension or pop-up blocker is not suppressing the download, and confirm you clicked Export on the database rather than on the server home page. Retry in a private browsing window to rule out extensions.
The dump is far bigger than expected: you probably exported from the server home page, which includes every database on the account. Select the specific database in the left navigation tree and export again.
You cannot see the database you expect: phpMyAdmin only shows databases the logged-in database user has been granted access to. Check the user is assigned to that database in your control panel's database section, with the privileges it needs.
The import into another server fails on a view or trigger: dumps record a DEFINER clause naming the database user that created the object. If that user does not exist on the destination server, the import errors. Edit the dump to remove the DEFINER=... clauses, or recreate the user on the destination first.
When phpMyAdmin Is the Wrong Tool
Browser-based exports run inside PHP and are bound by its time and memory limits, so they become unreliable somewhere in the region of a few hundred megabytes. For databases beyond that size, dump them over SSH with mysqldump, which streams straight to disk and has no browser in the way:
mysqldump -u yourdbuser -p yourdatabase | gzip > yourdatabase.sql.gzReplace yourdbuser and yourdatabase with your own values. You will be prompted for the database password. Never place the password directly on the command line, because it is then visible to other users of the server through the process list.
If your plan does not include SSH access, or the export keeps timing out, open a ticket from your Noiz client area. Noiz support can take the dump server-side and place the file where you can collect it.






