cPanel's built-in IP Blocker (older builds and some documentation call it the IP Deny Manager) lets you deny web access to your site from a single visitor, a range of addresses, or an entire network block. It is the quickest way to shut out an abusive visitor without editing any files by hand. If you would rather write the deny rules yourself, or you need to block an IPv6 address, see How to Block Any IP Address via an htaccess Rule.
Last reviewed: 27 July 2026, against cPanel & WHM with the Jupiter interface (current default). This guide is written for Noiz hosting and is kept current against cPanel. It complements, and does not replace, the official cPanel documentation linked below.
Official Documentation Reference
Prerequisites
- The cPanel login details for the account that hosts the website you want to protect.
- The IP address or range you want to block, taken from a reliable source rather than guessed. See Find the Address to Block below.
Find the Address to Block
Block the wrong address and you either achieve nothing or you shut out real customers, so confirm the address before you add it. Inside cPanel, the two most useful sources are:
- Metrics > Visitors, which lists recent requests to a domain along with the address that made them. This is the fastest way to spot a single address hammering one URL.
- Metrics > Raw Access, which downloads the full web server log. Use this when you need to see the pattern over hours or days rather than the last few hundred hits.
Application logs help too. WordPress security plugins, for example, record the address behind failed logins. Whatever the source, check your own current address first at a service such as whatismyip.com so you do not block yourself.
Block an IP Address
- Log in to your cPanel account.
- In the Security section, click IP Blocker.

- Under Add an IP or Range, enter the address you want to block. Any of the formats listed in the next section is accepted.
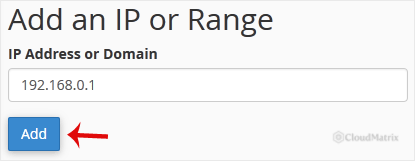
- Click Add.
The entry then appears under Currently-Blocked IP Addresses and takes effect immediately. There is no cache to clear and no service to restart. A blocked visitor receives a 403 Forbidden response.
Accepted Address Formats
The Add an IP or Range field takes more than a single address, so you can block a whole network in one entry:
- Single address:
192.168.0.1 - Range:
192.168.0.1-192.168.0.40 - Implied range:
192.168.0.1-40, which is shorthand for the range above - CIDR notation:
192.168.0.0/24 - Partial address:
10.blocks everything in10.0.0.0to10.255.255.255, and192.168.blocks everything in192.168.0.0to192.168.255.255
The addresses above are private ranges used here purely as examples. Replace them with the real address you want to block.
Partial addresses are powerful and easy to over-apply. A single trailing dot can cover more than sixteen million addresses, so use the narrowest entry that solves the problem.
Remove a Block
To unblock an address, return to IP Blocker, find the entry under Currently-Blocked IP Addresses, and click Delete. Confirm the removal when prompted. Access is restored straight away.
Good to Know
- It only covers the website. IP Blocker denies HTTP and HTTPS requests to the sites in that cPanel account. It does not block email, FTP, SSH or any other service, because it works by writing deny rules into the
.htaccessfile in your document root rather than at the server firewall. - The request still reaches the server. A blocked visitor is turned away by the web server, not before it. That is fine for a nuisance visitor, but it will not shield you from a large flood of traffic, because the connection is still accepted and answered.
- IPv4 only. The IP Blocker interface works with IPv4 addressing. If the traffic you want to stop arrives over IPv6, which shows up in logs as an address containing colons, block it with an
.htaccessrule instead. - Check for a proxy or CDN first. If your site sits behind a reverse proxy or content delivery network, the address the web server sees can be the proxy's rather than the visitor's. Blocking the address in your logs may then either do nothing or block every visitor at once. Where a CDN is in front of the site, block the visitor in the CDN's own dashboard.
- Dynamic addresses move. Most home and mobile connections are reassigned an address regularly, so blocking one address may only stop a determined visitor for a few hours. A range is more durable but risks catching innocent visitors on the same network.
- Do not block search engines. Before blocking a range, check who owns it with a WHOIS lookup. Blocking a crawler's range can remove your site from search results, and the damage is not obvious until traffic falls.
- The list is per account. Entries you add apply to every domain and subdomain in that cPanel account, not just the one you had in mind.
Troubleshooting
You have blocked yourself by mistake: connect from a different network, such as mobile data or a phone hotspot, log in to cPanel and delete the entry. Your hosting control panel is reached on a different port from the website, so in many cases the panel still loads even when the site does not.
The blocked visitor still gets through: the address has almost certainly changed, or the traffic is arriving through a proxy or VPN. Recheck the logs for the address in use now, and consider blocking the wider range that the address belongs to.
Your site returns a 500 Internal Server Error after adding an entry: this points to a conflict in the .htaccess file in your document root, usually where another tool has written overlapping rules. Remove the entry from IP Blocker, then open a support ticket and Noiz will sort out the file.
Everyone is blocked, not just the visitor: a partial address or CIDR entry is broader than intended. Delete it and add a single address instead.
Need a Hand?
On a Noiz managed hosting plan you do not have to deal with repeat offenders alone. If you are seeing sustained abuse, unusual traffic or a suspected attack, open a support ticket from your Noiz client area and the team will identify the source and put the right blocks in place, including firewall-level blocks that reach beyond the website itself.






