Directory Privacy in cPanel lets you put a username and password in front of any folder in your hosting account, so a visitor has to authenticate before the browser will show anything inside it. It is the quickest way to lock down a staging area, a client preview, a private download folder or an admin section without writing any code. You may also see the feature called password protected directories or htpasswd protection.
Behind the scenes cPanel writes a standard .htaccess file into the folder and stores the usernames and hashed passwords in an .htpasswd file outside your web root. That switches on HTTP Basic Authentication, so the protection covers the whole folder and every file and sub-folder beneath it, and it is enforced by the web server before your application ever runs.
Last reviewed: 27 July 2026, against cPanel with the Jupiter interface (current default). This guide is written for Noiz hosting and is kept current against cPanel. It complements, and does not replace, the official cPanel documentation linked below.
Official Documentation Reference
Prerequisites
- An active Noiz cPanel hosting account and your cPanel login details.
- The path of the folder you want to protect, for example
public_html/membersorpublic_html/staging. - An SSL certificate active on the domain, so credentials are sent over HTTPS rather than in clear text. If the domain is not covered yet, you can issue a certificate from the SSL/TLS Status area in cPanel.
Protect a Directory Step by Step
Directory Privacy sits in the Files section of the cPanel home page. If you cannot spot it, type Directory Privacy into the search box at the top of the page to jump straight to it.
-
Log in to your cPanel account.
-
In the Files section, click Directory Privacy. On some cPanel builds this tool is also surfaced under a Security group; either entry opens the same screen.
-
Click a directory name to open it and browse to the folder you want to protect. Clicking the name navigates into the folder, which is how you reach nested paths such as
public_html/staging.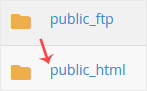
-
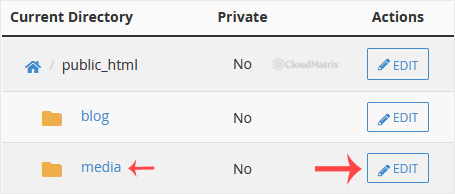
Click Edit next to the directory you want to protect. Use the Edit button rather than the folder name, which only navigates deeper.
-
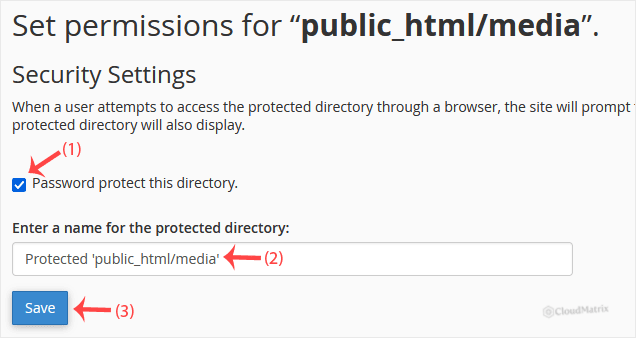
Under Security Settings, tick Password protect this directory and give the protected area a name, then click Save. That name appears in the browser login prompt, so keep it descriptive and do not put anything confidential in it.
-
Click Go Back to return to the settings page.

-
Scroll down to Create User. Fill in a username and password, or use the Password Generator to create a strong random password. If you generate one, copy it somewhere safe before you continue, because cPanel stores only a one way hash and cannot show it to you again. Click Save.
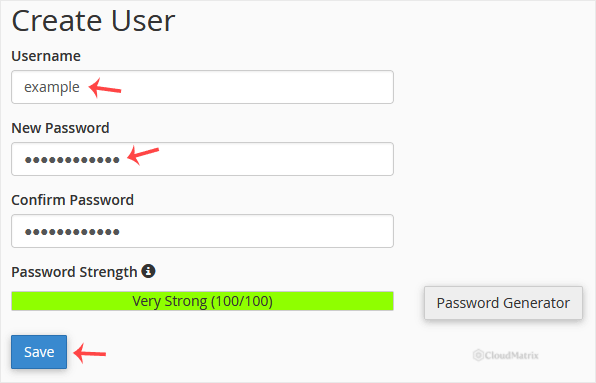
The folder is protected as soon as the user is saved. There is no waiting period and nothing to restart. If you open the folder in a browser at an address such as https://yourdomain.com/myfolder (replace with your own domain and folder), the browser prompts for the username and password before it shows any content.
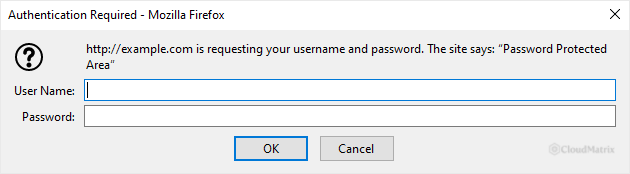
Test in a private or incognito window. Browsers cache Basic Authentication credentials for the rest of the session, so a normal window will often let you straight through and make it look as though nothing was applied.
Add, Change or Remove Users
Go back into Directory Privacy, browse to the folder and click Edit again.
- Add another user: complete the Create User fields and click Save. A directory can hold as many users as you need, which is the tidy way to give several people access without everyone sharing one password.
- Change a password: enter the existing username with the new password in Create User and save. cPanel overwrites the stored hash for that user.
- Remove a user: select the username in the authorised users list and click Delete User.
- Remove protection entirely: untick Password protect this directory and click Save. Deleting the users on their own is not enough, because the folder stays protected and simply has nobody left who can get in.
Good to Know
- It protects everything inside the folder. Every file and sub-folder is covered, including files you add later. There is no per-file control, so put private material in its own directory rather than mixing it with public files.
- It protects paths, not data. Anything reachable through a different path is still public. Protecting
public_html/uploadsdoes nothing for the same files if a script serves them from elsewhere or another folder exposes them. - Do not protect your document root by accident. If you enable Directory Privacy on
public_html, the whole website asks for a password. That is fine for a staging site, but it also blocks payment callbacks, webhooks and search engine crawling, and it is a common way to lock every visitor out of a live site. - Keep HTTPS on. Basic Authentication sends the username and password with each request, Base64 encoded rather than encrypted. Over HTTPS that is protected in transit; over plain HTTP it is effectively in the clear. Always access a protected folder via
https://. - It is a layer, not a replacement. Directory Privacy in front of an application login is a useful extra barrier, but it is not a substitute for keeping that application patched and its own accounts secure.
- Browsers remember the login for the session. To force the prompt again after a successful login, close the browser or use a private or incognito window.
Troubleshooting
The browser does not ask for a password: you are probably still authenticated from earlier in the session, or the page is cached. Test in a private or incognito window, and clear any caching plugin or CDN sitting in front of the site, since a cached response can be served without ever reaching the web server.
The login box keeps reappearing with the correct password: the credentials are being rejected rather than accepted. Recreate the user with a freshly generated password, and watch for a trailing space picked up when pasting.
You see a 500 Internal Server Error after enabling protection: this usually points to a conflict in an existing .htaccess file in that folder. Open File Manager, switch on Show Hidden Files in its settings and inspect the file, or open a support ticket and Noiz will resolve it.
Parts of the site stop working: scripts, stylesheets, images and API endpoints under the protected path are subject to the login too. Protecting a WordPress wp-admin folder, for example, also blocks admin-ajax.php and breaks front end features that depend on it. Protect a level that matches the boundary you actually want.
You have locked yourself out of the whole site: protection was almost certainly enabled on public_html. Return to Directory Privacy, edit that directory, untick Password protect this directory, and save.
Directory Privacy is not in your cPanel: the feature is controlled by the hosting package. If your plan should include it, contact Noiz support.
If you need a hand setting up protected areas, or you have locked out a live directory and cannot get back in, open a support ticket from your Noiz client area and the team will assist. On a managed plan, changes of this kind can be handled for you.






