An addon domain lets you host a completely separate website from inside your existing cPanel account. The addon domain gets its own document root, its own email addresses and its own DNS records, yet it lives within the hosting account you already pay for. To visitors it looks and behaves like a fully independent website.
This guide shows you how to add an addon domain in current cPanel, where the old standalone Addon Domains tool has been folded into a single Domains interface.
Last reviewed: 27 July 2026, against current cPanel & WHM. Since cPanel version 90 the separate Addon Domains, Aliases and Subdomains tools were consolidated into one Domains interface, so the steps below use that interface. This guide is written for Noiz hosting and is kept current against cPanel. It complements, and does not replace, the official cPanel documentation linked below.
Official Documentation Reference
- cPanel Domains interface: the current tool for creating and managing addon domains, aliases and subdomains.
Prerequisites
- The domain you want to add is registered and, ideally, not actively hosted somewhere else.
- The addon domain points at your hosting before you add it. Set its nameservers to the same nameservers your primary Noiz hosting domain already uses (typically
ns1.noiz.co.zaandns2.noiz.co.za), then allow time for propagation. DNS changes usually take between a few hours and 24 hours to take effect worldwide. - Your hosting plan has an addon domain slot free. If you have reached your plan limit, contact Noiz support to upgrade.
Add an Addon Domain
1. Open the Domains interface
Log in to your cPanel account, then in the Domains section click Domains. On older cPanel themes this icon may still be labelled Addon Domains.

2. Start a new domain
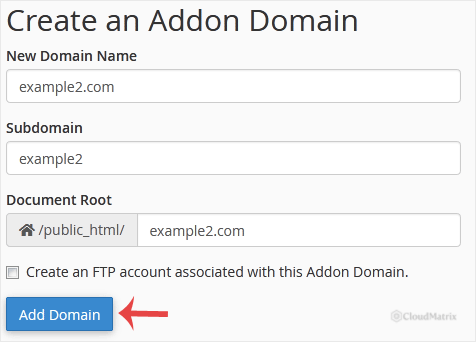
Click Create A New Domain (on older builds this is the Create an Addon Domain form), then complete the fields:
- Domain: the addon domain name you want to host, for example
example2.com(replace this with your own domain). - Document Root: cPanel fills this in automatically from the domain name. Leave it as suggested unless you have a specific reason to change it.
- Share document root: leave the Share document root... option unticked so the addon domain gets its own separate folder and does not serve the same files as your primary domain.
3. Submit
Click Submit (labelled Add Domain on older builds). cPanel creates the addon domain, its document root folder and a matching DNS zone.
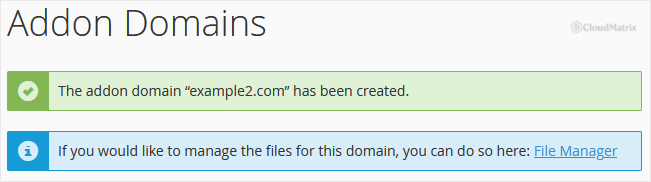
You should see a confirmation message that the addon domain has been created. It goes live once DNS has fully propagated.
Good to Know
- An addon domain also creates a subdomain. cPanel automatically creates a subdomain of your primary domain (for example
example2.yourprimary.com) that points at the same files. This is expected behaviour and can be ignored. - Upload your website files to the addon domain's own document root, not your primary
public_htmlfolder. Use the cPanel File Manager or an FTP/SFTP client. - Email, DNS and SSL for the addon domain are all managed from the same cPanel account. Once DNS points at the server you can issue a free SSL certificate for the addon domain from the SSL/TLS Status area.
Troubleshooting
Symptom: "The domain already exists" or a warning that the domain is not registered or not pointing here. The domain may already be added to another cPanel account on the server, or its nameservers are not yet pointing to your hosting. Confirm the nameservers, wait for propagation, then try again.
Symptom: the addon domain shows your primary website instead of its own content. The Share document root option was left ticked, so both domains serve the same folder. Remove and re-add the domain with that option unticked, or move your files into the addon domain's own document root.
Symptom: the site does not load after you add it. DNS propagation is usually the cause. Allow up to 24 hours, then re-check. Also confirm you have uploaded content to the correct document root.
Need a Hand?
If your addon domain will not resolve, or you are unsure which nameservers to use, Noiz support can check the DNS and account configuration for you. Open a ticket from your Noiz client area and include the addon domain name.






